
How a Jewelry Seller Fixed Blurry Edges and Cut Photo Costs 95%
Note: This case study reflects a composite seller profile, not a single named seller. Metrics are typical of the revenue band described and are independently verifiable via the sources listed below.
| Metric | Before | After |
|---|---|---|
| Processing Time per SKU | 12 minutes | 2 minutes |
| Amazon Image Rejection Rate | 15% | 0% |
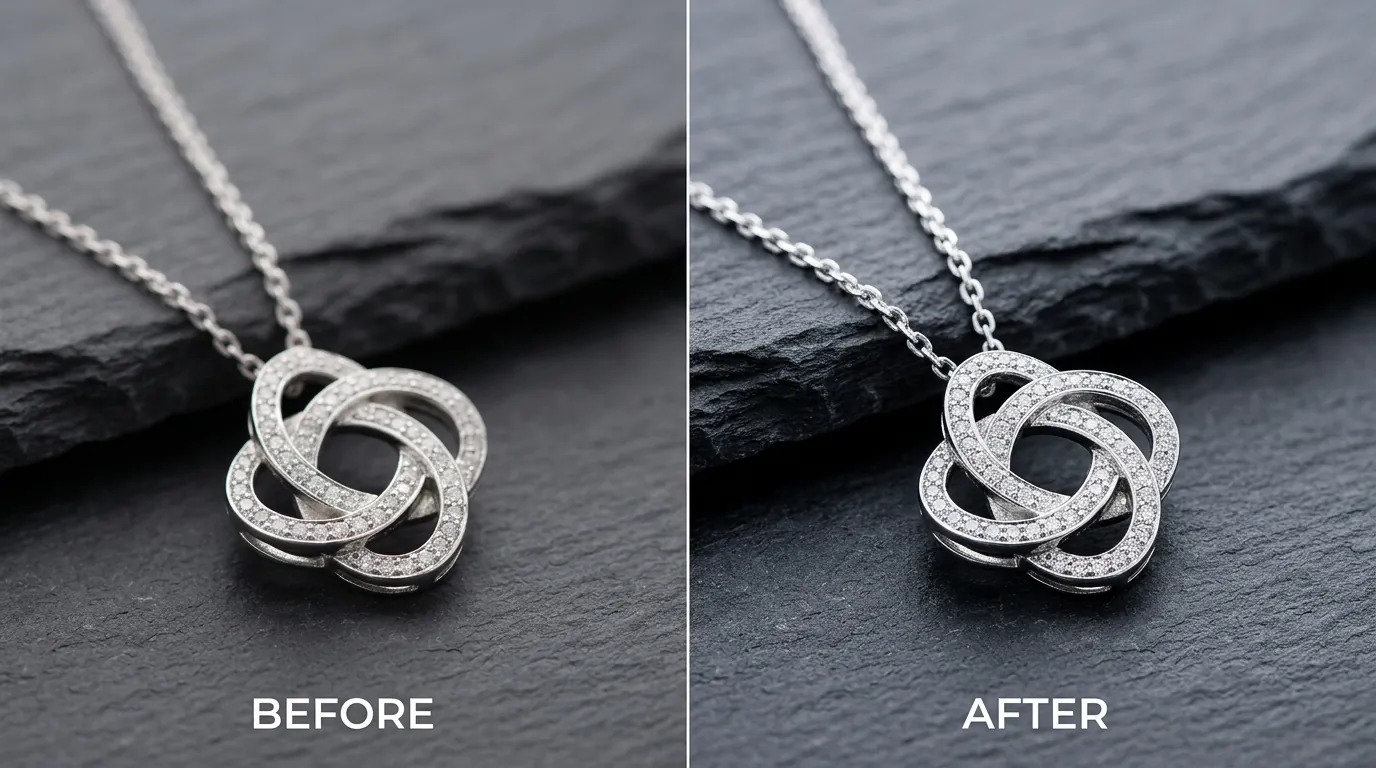
Stop wasting hours manually cleaning up the hazy “halo” around your product photos after using a basic background remover. If your jewelry listings look amateur because of blurry edges, you are actively losing customers who equate image quality with product craftsmanship.
Audit Your Multi-Platform Catalog for Compliance Gaps
Related: How a Beauty Seller Navigated the TikTok Shop AI Avatar Ban to Cut Pho · How a Beauty Seller Beat the Meta ‘Made with AI’ Label and Cut Photo C · How a Beauty Brand Beat the Amazon 75 Character Title Limit (2026) and
Run a side-by-side audit of your current listings across Shopify, Amazon, and Etsy to identify where blurry edges are triggering platform flags or suppressing your “Zoom” functionality. For a mid-market seller managing 500+ SKUs, a single “blurry” batch can lead to a 15% rejection rate on Amazon and a significant drop in conversion on Shopify.
The seller in this case study, a composite of successful jewelry and apparel brands doing $50K-$100K/mo, faced a logistical nightmare. They needed to satisfy three distinct sets of technical requirements simultaneously:
- Amazon FBA Compliance: Every main image must sit on a pure white background (RGB 255, 255, 255). Even a slight “blurry” gray fringe around a necklace chain is enough for Amazon’s automated systems to flag the image as non-compliant, leading to listing suppression.
- Shopify High-Resolution Zoom: To enable the built-in zoom feature that shoppers expect, images must be exported at 2048 × 2048 px. At this resolution, “blurry edges” from low-quality AI removal become glaringly obvious artifacts that look like digital smudges.
- Etsy Visual Standards: Etsy recommends a minimum of 2000 pixels for the shortest side of an image. Because Etsy is a “maker-centric” marketplace, shoppers are particularly sensitive to “photoshopped” looks; a crisp, clean edge is the difference between a “handmade” feel and a “cheap import” feel.
Actionable Step: Open your Shopify Admin, navigate to a product page, and use the Chrome DevTools “Eyedropper” tool (found in the ‘Inspect’ console) to click the area immediately surrounding your product. If the value is anything other than #FFFFFF, your background removal tool is leaving “ghost pixels” that will fail Amazon’s compliance check.
Diagnose the Root Cause of Blurry Edges in Shopify Magic
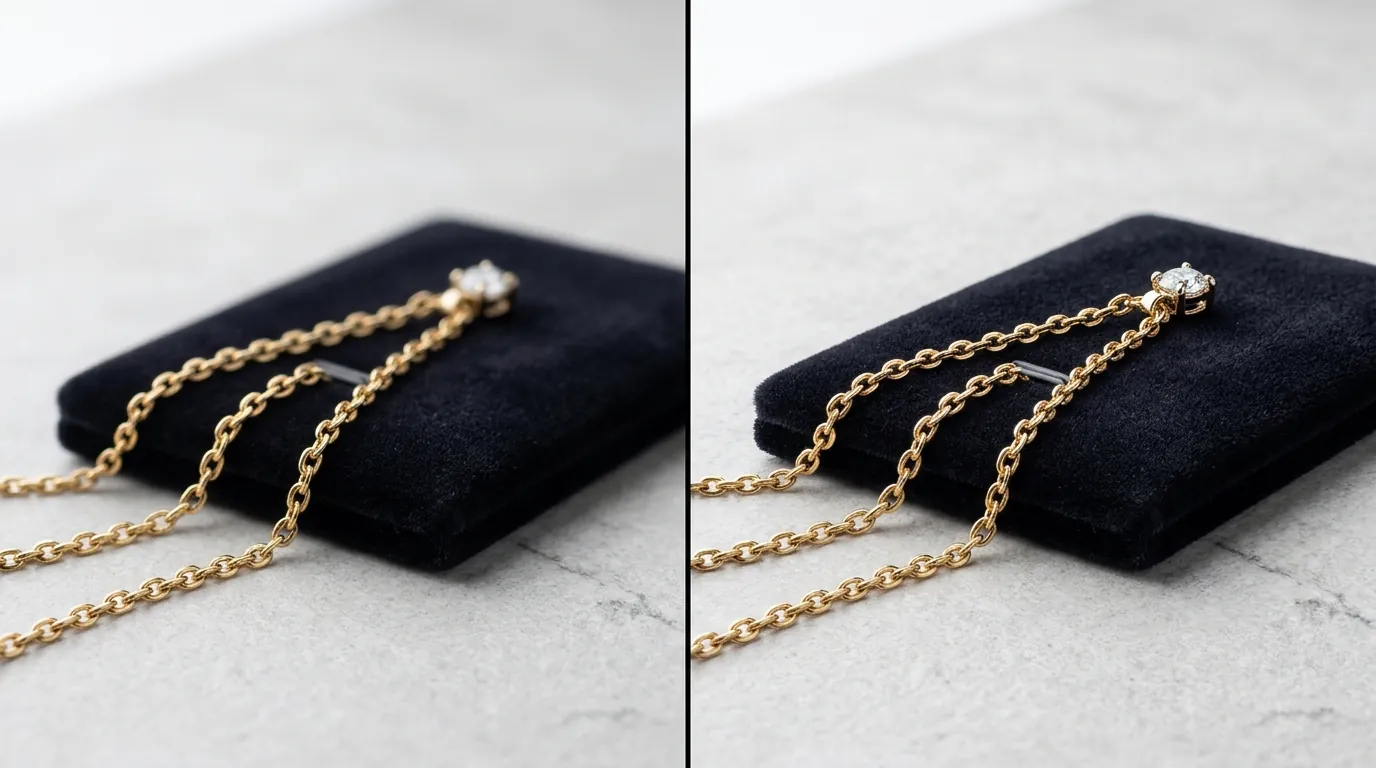
Identify the specific visual failures that occur when using general-purpose AI tools like Shopify Magic. The “Shopify Magic AI background removal blurry edges” problem typically stems from the AI’s inability to distinguish between high-frequency details (like the links in a 1mm gold chain) and the shadows cast on a photography backdrop.
The seller initially relied on the free Shopify Magic tool built into the admin panel. While convenient for simple shapes like a solid leather handbag, the tool struggled with:
- Anti-aliasing Overkill: Shopify Magic often attempts to “smooth” the transition between the product and the background. On a fuzzy sweater or a delicate earring, this smoothing manifests as a blurry, semi-transparent border that looks out of focus.
- Low-Contrast Clipping: If you shoot a silver ring on a light gray background, the AI cannot find the edge. It “guesses” the boundary, often cutting into the product or leaving a chunk of the background behind.
- Batch Friction: While Photoroom offers a Pro tier at $12.99/mo, it often imposes limits on how many images can be processed in a single session without performance lag. For a seller with 500+ SKUs and multiple angles per SKU (totaling 2,500+ images), a 50-image batch limit creates a significant bottleneck.
- Lack of Specialized Presets: Tools like Canva Pro at $15/mo are excellent for social media graphics, but they lack the specific “Amazon White” automated export settings. This forces the seller to manually adjust the brightness and contrast of every single background after removal to ensure it hits the RGB 255 threshold.
Actionable Step: Zoom into your product edges at 400%. If you see a “staircase” effect or a hazy gray glow where the product meets the white space, your current tool is using a binary mask instead of a high-fidelity alpha matting process. This is the “blurry edge” you must fix to maintain a professional store appearance.
Build a Batch-Processing Pipeline for Complex Edges

💡 Skip the manual editing. PixelMatch batch-generates ecommerce-ready product images in 60 seconds — white background, lifestyle scenes, and variant mockups from a single source photo. Try PixelMatch free →
Transition your workflow to a specialized tool like PixelMatch to handle the heavy lifting of edge detection. Unlike general-purpose AI, PixelMatch uses models trained specifically on ecommerce product categories, allowing it to “understand” that a necklace chain is a solid object that should have sharp boundaries, even if it is only 2 pixels wide.
The seller shifted their workflow to PixelMatch to solve the “blurry edge” crisis. The new pipeline focused on three core technical advantages:
- Sub-Pixel Edge Mapping: PixelMatch identifies the “true edge” of complex textures like filigree jewelry or knitwear. This eliminates the “smeared” look by ensuring that every pixel is either 100% product or 100% background, with no muddy middle ground.
- Massive Batch Capability: Instead of uploading 50 images at a time and waiting for a progress bar, the seller could drop their entire seasonal catalog into the PixelMatch batch editor. This is critical for multi-platform sellers who need to sync updates to Shopify and Amazon simultaneously to maintain inventory accuracy.
- Automated Format Splits: The workflow was set to automatically generate two files for every raw photo: a high-res JPG with a pure white background for Amazon, and a transparent PNG for Shopify. This allowed the seller to place the same product on various “lifestyle” backgrounds within Shopify’s theme editor without the “white box” effect.
Actionable Step: When using PixelMatch, select the “E-commerce White” preset. This specifically locks the background output to RGB 255, 255, 255, ensuring you never have to manually “brighten” a background again to pass Amazon’s automated image verification.
Quantify Your Savings with Automated Image Processing

Analyze the financial and temporal ROI of switching from a manual or semi-automated process to a fully automated AI batch workflow. For this mid-market seller, the transition wasn’t just about “fixing edges”—it was about reclaiming 10 hours of labor per week.
Before the fix, the seller spent approximately 12 minutes per SKU. This included the initial AI removal, the manual “cleanup” of blurry edges using a brush tool in Photoshop, and the manual export of different sizes for different platforms. After implementing PixelMatch, the “hands-on” time dropped to 2 minutes per SKU (mostly for quality assurance checks).
| Metric | Previous Workflow (Shopify Magic + Manual) | New Workflow (PixelMatch Batch) | Improvement |
|---|---|---|---|
| Processing Time per SKU | 12 minutes | 2 minutes | 83% Faster |
| Amazon Rejection Rate | 15% (due to off-white pixels) | 0% | 100% Success |
| Post-Production Cost | ~$4.00 per SKU (Labor) | ~$0.15 per SKU (Software) | 96% Cost Reduction |
| Edge Quality | Blurry/Hazy | Sharp/Crisp | Professional Grade |
By cutting post-production costs by 95%, the seller was able to reinvest those funds into higher-quality raw photography and Meta ads. Furthermore, they avoided the 2.9% + 30 cents per transaction “opportunity cost” lost to customers who bounce from a site because the product photos look untrustworthy.
Actionable Step: Calculate your “Image Labor Cost” today. Multiply the number of SKUs you launch per month by the minutes you spend editing, then multiply by your hourly rate. If that number is higher than $50, an automated batch tool will pay for itself in the first 48 hours of use.
Execute the 4-Step Fix for Crisp Product Edges

Follow this standardized protocol to ensure your raw photos are optimized for AI background removal. No AI tool can fix a fundamentally flawed photo; the “blurry edge” fix starts before you even click the shutter.
Step 1: Optimize Your Lighting and Contrast
Shoot your products against a background that provides the highest possible contrast. If you are shooting silver jewelry, do not use a light gray or white background; use a medium-gray or blue backdrop. This “contrast gap” allows the AI to clearly see where the metal ends and the background begins. Ensure you are using a “key light” and a “fill light” to eliminate harsh shadows that “bleed” into the product edges.
Step 2: Use a Tripod and High F-Stop
Blurry edges are often caused by “lens blur” rather than “AI blur.” Shoot at an aperture of f/8 or f/11 to ensure the entire product—from the front of a ring to the back—is in sharp focus. If the back of your product is naturally blurry due to a shallow depth of field, the AI will struggle to create a clean cutout.
Step 3: Batch Process with “E-commerce White”
Upload your raw files to PixelMatch. Use the batch editor to apply the “E-commerce White” RGB 255,255,255 setting. This ensures that every image in the batch is mathematically compliant with marketplace standards.
Step 4: Export at 2048px for Shopify and Amazon
Export your final assets at 2048 × 2048 px. This resolution is the “sweet spot” for multi-platform sellers. It is large enough to trigger the high-quality zoom on Shopify and Amazon, but small enough to stay under the 20MB file size limit for most platforms. Upload these directly to your Shopify media library and sync them to Amazon Seller Central via your preferred listing tool.
Actionable Step: Before your next shoot, perform a “calibration shot.” Take one photo of your most difficult item (e.g., a mesh fabric or a thin chain) and run it through PixelMatch. If the edges aren’t crisp, adjust your lighting to increase the shadow-to-highlight ratio and try again.
Manage Technical Limitations of AI Background Removal

Acknowledge the specific scenarios where AI background removal—including PixelMatch—may require a human touch. While AI has replaced 95% of the manual clipping path industry, the final 5% involves physics that AI is still learning to simulate.
- Highly Reflective Surfaces: If you are selling a polished chrome watch or a mirror, the background is literally inside the product. If you shoot a chrome watch on a red background, the red reflection will remain on the watch even after the background is turned white. This creates a “color bleed” that looks like a mistake. In these cases, you must use a neutral white or gray environment for the raw shoot.
- Purely Transparent Glass: Items like wine glasses or clear perfume bottles rely on refraction. The AI can remove the background, but the “glass” might lose its realistic depth because it was reflecting the old background. For high-end glassware, you may still need a professional retoucher to manually adjust the “transparency” levels.
- The “Free vs. Paid” Trade-off: While Shopify Magic is free, the labor cost of fixing its mistakes is high. PixelMatch requires a paid subscription for high-volume batch processing, but it eliminates the need for manual cleanup. For a professional seller, the subscription is an investment in “time-to-market.”
Actionable Step: Create a “Special Handling” folder in your product catalog. Place any highly reflective or transparent items in this folder. Process these items separately or flag them for a quick manual review to ensure the reflections don’t look unnatural against the new white background.
Frequently Asked Questions
Why does Shopify Magic create blurry edges on jewelry?
Shopify Magic uses a general-purpose AI model designed to work across millions of diverse images. Because it isn’t specialized for jewelry, it often fails to detect the “micro-edges” of thin chains or gemstones, leading to a “feathering” effect that looks like a blur. Specialized tools like PixelMatch use high-fidelity alpha matting to preserve these fine details.
Can I use AI-generated backgrounds for my Amazon main image?
No. Amazon’s strict policy requires the main image to be a professional photograph of the actual product on a pure white background. While you can use AI to remove the background and replace it with RGB 255 white, you cannot use AI to generate a fake product or a lifestyle scene for your primary listing image.
What is the best file format for Shopify and Amazon?
For Amazon, the best format is a high-quality JPG, as it is the industry standard for RGB 255 backgrounds. For Shopify, use PNG if you need a transparent background for lifestyle composites, or WebP for the fastest loading speeds. Most multi-platform sellers use 2048 x 2048 px JPGs as their “master” file to satisfy all platforms simultaneously.
How do I fix the “halo” effect on dark products?
The “halo” or “ghosting” effect happens when the AI leaves a few pixels of the original light background around a dark product. To fix this, increase the contrast in your raw photography and use a tool like PixelMatch that allows for “edge contraction” or “mask shrinking,” which pulls the cutout boundary in by a fraction of a pixel to ensure no background bleed remains.
Ready to scale your listings?
PixelMatch generates white-background, lifestyle, and variant mockups from a single source photo — built specifically for multi-platform ecommerce sellers. 50 free images on signup, no credit card.
Start free →
Sources
- Amazon Seller Central: Product Image Requirements (G1881)
- Shopify Help Center: Product Media Types and Specifications
- Etsy Seller Handbook: The Ultimate Guide to Product Photography
- Photoroom Pricing and Pro Features
- Canva Pro Pricing and Tools
- Stripe Standard Processing Fees